


-
Smartify

- Jun 14, 2019
- Tags
Guide: How to make Cross Platform Desktop UI Applications with Python
Comprehensible walkthrough to get your UI Application running with PyQt

https://www.piecex.com/products/Stock-Photo-Finder-Python-Cross-Platform-Desktop-UI-Program-531

Premise
We are going to use python, especifically python 3 and pip, specifically pip3 here. Everything should work in Python 2 as well, sometimes there are minor difference. But in order to be more future proof, this guide chooses to opt for python 3.
Please install python and pip on your system, these steps are not covered here. The reason is that the installation progress is based on your operating system and can vary a little.
In general for windows you visit the python websites, download
and install it. Then download the get-pip.py and run it from python. In Linux you use your package manager. On Mac you can install Xcode, brew and then python3 via brew.
Building desktop UI applications may seem like something out of scope for Python, but in fact it is rather straight forward.
In fact many applications you may know are written in Python, such as Cinema 4D, Blender and Dropbox.
We will use PythonQT (PyQt) and Designer (designer-qt). Other UI libraries do exist of course but QT is easy and cross platform.
This topic will come up later again but if you are at all familiar with Visual Studio or Visual Basic UI making,
the process of creating the UI here is actually very familiar.
Prerequisites
First we need to install the prerequisite libraries.
We will need PyQt it self and then PyQt5-tools which includes the designer, which is the application used to make your UI.
Run these:
pip3 install pyqt5
pip3 install pyqt5-tools --pre
It it worked you should be ready to go.
Let's launch the designer, get familiar with the interface and make our first UI.
It should launch via the command:
designer
That's it. There are some variations like:
qt4-designer
and
designer -qt5
But the normal call should work just fine usually. Even on Windows.
If you want to run a specific version though, this is how you will do it.

This is the designer. It enables you to place, style and transform numerous types of UI elements which you can find on the left list.
Styling with CSS
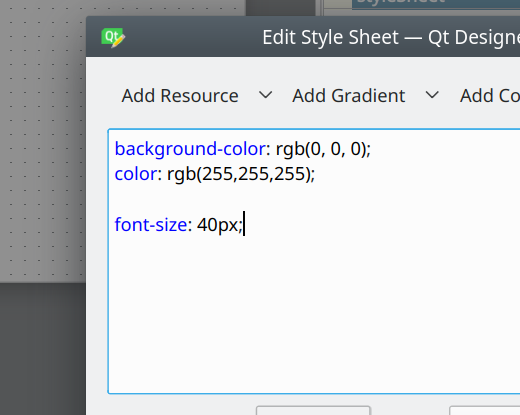
If you are used to other similar systems like Visual Studio or Visual Basic, you are also familiar with the properties window that you can see on the right, which shows all properties of a selected object. However unlike in those, if you want to change any visual aspects about an object, here you actually do this via CSS. Find the property call STYLESHEET, use the 3 dots menu to open its window.

In this window you can write CSS code. Either write freely or use the upper menu to see which values you can actually use. Obviously not all of CSS can be used, but only these specific modifiers.


You can save your UI by going to the top menu select File->save as and then save the file as an .ui file.

So how to add code to this UI and how to run it as an application?
UI to Application
Convert .ui files directly into python code. Lets first look at this optional command to convert an UI to a py file:
pyuic5 -x myform.ui -o myprogram.pyThis command will convert the entire .ui file directly into a .py file that describes everything that has been done in that UI. Meaning everything is described in the .py and you don't need the .ui file at all anymore. Except for reopening it in the designer to change things later.
Here is what the resulting .py code file looks like:
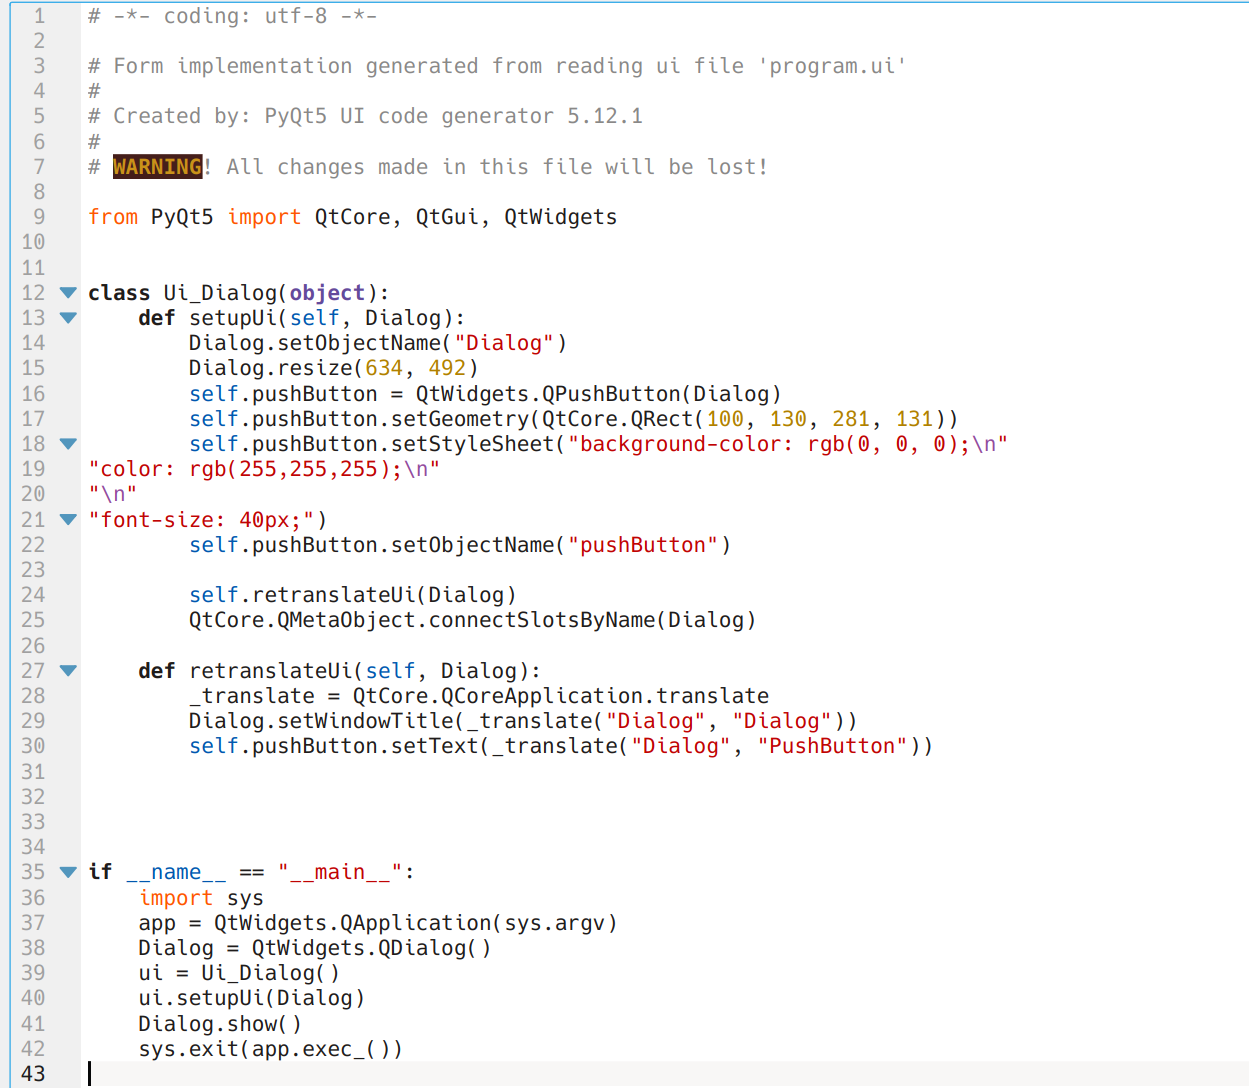
The usefulness depends on your workflow, because every time you now want to change anything in your UI and then convert again, you will override the file of course. This means you would have to save all code beforehand. In practicality this means just putting your code into another file anyway and reference it.
But if you do that you might aswell just use the following option, which is to just refer to the .ui file in the initialization of pyqt.
So let's write a Python program that references our .ui file as an external file, loads it in upon startup and creates the program from that. This way, whenever the ui file changes, we don't have to change our code file / the program at all, nothing changes
and it will work. Of course if you remove or rename objects that you refer to, then those will fail obviously.
Let's call this file reference_example.py:
from PyQt5 import QtWidgets, uic

app = QtWidgets.QApplication([]);
dlg = uic.loadUi("myform.ui")

dlg.show()
app.exec()
This would be a very basic start. This will run and show your UI.
NOTE: app.exec() will only work in python3, in 2 you need app.exec_() because exec is a keyword in python 2.
So when you run this file via python3 reference_example.py it will show you the application using your UI and function.
Of course right now there is no code at all, so no functionality. So let's add some.
from PyQt5 import QtWidgets, uic

app = QtWidgets.QApplication([]);
dlg = uic.loadUi("myform.ui")

dlg.pushButton.setText("TESTING")

dlg.show()
app.exec()
Now when you run this, the program will start with our button having a different label text.
However the program still does nothing. So let's add code to the click of the button. For this we have to register an event.
To register code to an even you refer to the event name and then use .connect() with the function name. In this case:
dlg.pushButton.clicked.connect(ourFunction)
Here is an example:
from PyQt5 import QtWidgets, uic

app = QtWidgets.QApplication([]);
dlg = uic.loadUi("myform.ui")

def someFunction():
    dlg.pushButton.setText("CHANGED")

dlg.pushButton.clicked.connect(someFunction)

dlg.show()
app.exec()
You can also define connections in the designer:

I would recommend just sticking to code though, but it's a way to see all the events.
And there you have it. The designer has a great variety of UI elements, you can make your own by combining them, using stylesheets you can style everything. Using events you can implement your code. That is everything that you need.
https://www.piecex.com/products/Stock-Photo-Finder-Python-Cross-Platform-Desktop-UI-Program-531
Search Articles
Popular Articles


Comments
Add your comment